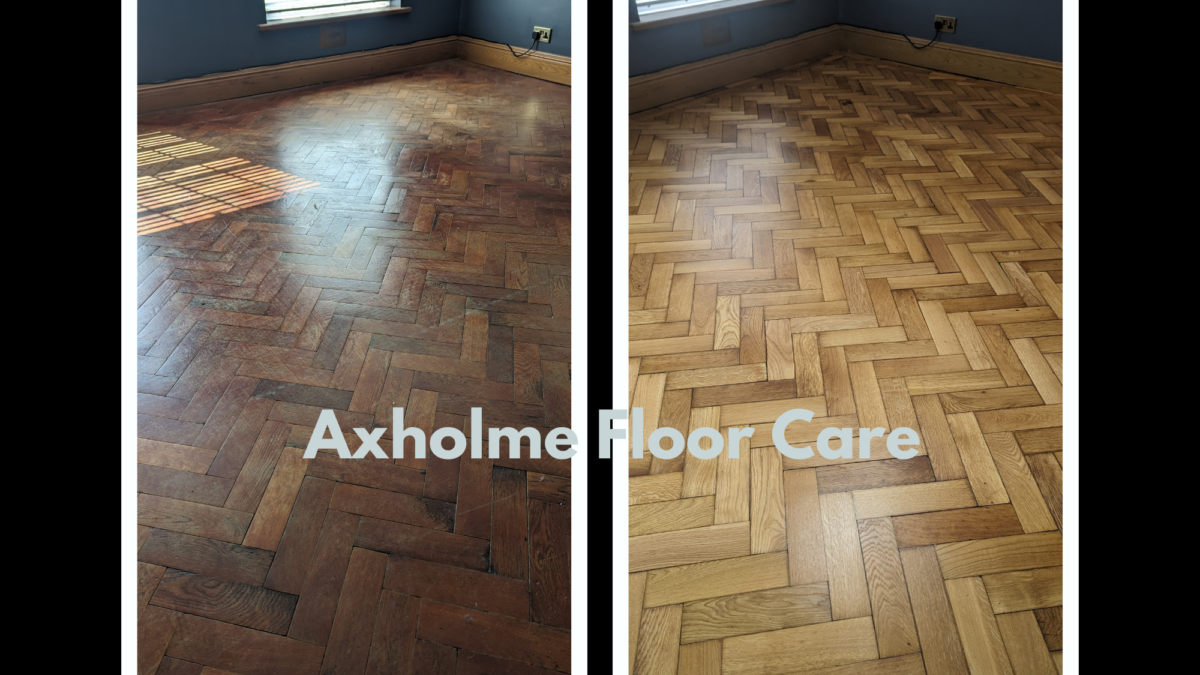
5 Finger Parquet Flooring
28th April 2023Parquet floors are a beautiful and timeless addition to any home. However, over time, they can become worn and damaged, losing their original lustre and beauty. If you’re lucky enough to have parquet floors in your home that are in need of restoration, then you’re in for a treat! In this blog post, we’ll be discussing a parquet floor restoration project and the steps taken to restore the floor to its former glory.
Step 1: Assessment and Planning
Before beginning any restoration project, it’s important to assess the condition of the floor and plan accordingly. This includes identifying any damage, such as scratches, dents, or gaps between the tiles. Additionally, it’s important to consider the type of wood and finish used on the floor, as this will determine the restoration process.
Step 2: Sanding
Once the assessment is complete, the next step is to sand the floor. Sanding involves removing the top layer of the floor, which can help to eliminate scratches and dents. In this project, a floor sanding machine was used to sand the parquet floor, starting with a coarse grit sandpaper and working up to a finer grit for a smooth finish.
Step 3: Repairing
After sanding, any gaps or cracks in the floor were repaired using a wood filler. This helps to create a smooth surface and ensures that the tiles are level. Once the filler has dried, the floor is sanded again to create a seamless finish.
Step 4: Staining and Finishing
The final step in the restoration process is staining and finishing the floor. Staining helps to enhance the natural colour of the wood, while finishing protects the floor from future damage. In this project, a clear varnish was used to protect the floor, while also enhancing its natural beauty.
The end result is a stunning parquet floor that looks brand new. Not only does it add value to the home, but it also creates a warm and inviting atmosphere. With proper maintenance, a restored parquet floor can last for many years to come.


